HEATED SEAT PAD fITMENT
Question: How do I install heated seats to my vehicle. Answer: Call RVE and book a fitting date -or see below.
HEATER PAD INSTALLATION INSTRUCTIONS - GENERIC
Kit Contains:
2x Carbon Element Heater pads 550 x 280 mm with self-Adhesive strips with
Inbuilt Electronic temperature control module
1x Dual temp high/low bicolor illuminated round switch
Pre-Wired harness with inline fuse holder and earthing eyelet
12 Volt Relay and block connector
RVE recommends that the seat heaters be installed by a qualified professional installer. The Installer shall be liable for any damage, due to the improper fitting and installing of RVE seat heaters. Improper installation will void the warranty.
1. Ensure that the vehicle is on a level surface in “Park” and with the hand brake engaged.
2. Disconnect the vehicle’s battery
3. Unplug any wires which may be attached to the underside of the vehicle’s seat. Proceed to unbolt the seat from the vehicle’s floor.
4. Carefully remove the seat out of the vehicle to allow for easier access to the vehicle’s seat and seat cover trim.
5. Carefully remove the seat covers off the seat by detaching the clips which bind the backrest cover together. Then, detach the clips which secure the seat bottom seat cover. These clips secure the cover at the base/perimeter of the bottom of the seat. Note: some side handles and covers may need detaching to remove the seat covers.
6. Place the backrest and the seat base heating pads against the respective backrest and seat base. Align the heating pads against the seat and “mark” the listing/retainer wire area to be cut to allow for the re-installation of the backrest and cushion covers.
7. Carefully cut no more than 2 holes side to side (horizontally)
8. DO NOT cut the heater pads top to bottom (vertically) any larger than 25mm/1 inch. The heat runs side to side on the pads, so the pads will be cooler across the area where any cover attachment holes are made.
9. Remove the protective backing from the back side of the seat heating pad and carefully adhere the pad of the seat at the desired location.
10. The holes made through the pad should align with the identified cover retainer wires/listing attachment locations. Insulating tape or strips should be attached to the pads where retainers touch.
11. Refit the seat covers.
12. Route the wire connectors to a central position under the seat and fix neatly in position.
NOTE:
Older style listing = wire rod and listing sleeve retainers sewn on back of seat covers (requires hog rings for the installation). Newer style listing incorporates Velcro attachments or plastic strips.
For older style listings secure one of the provided strips of adhesive tape around the wire listing rod to insulate it and use cable ties to secure the seat cover – DO NOT use metal cover retainer hog rings through the heater pads.
WIRING INSTALLATION - GENERIC
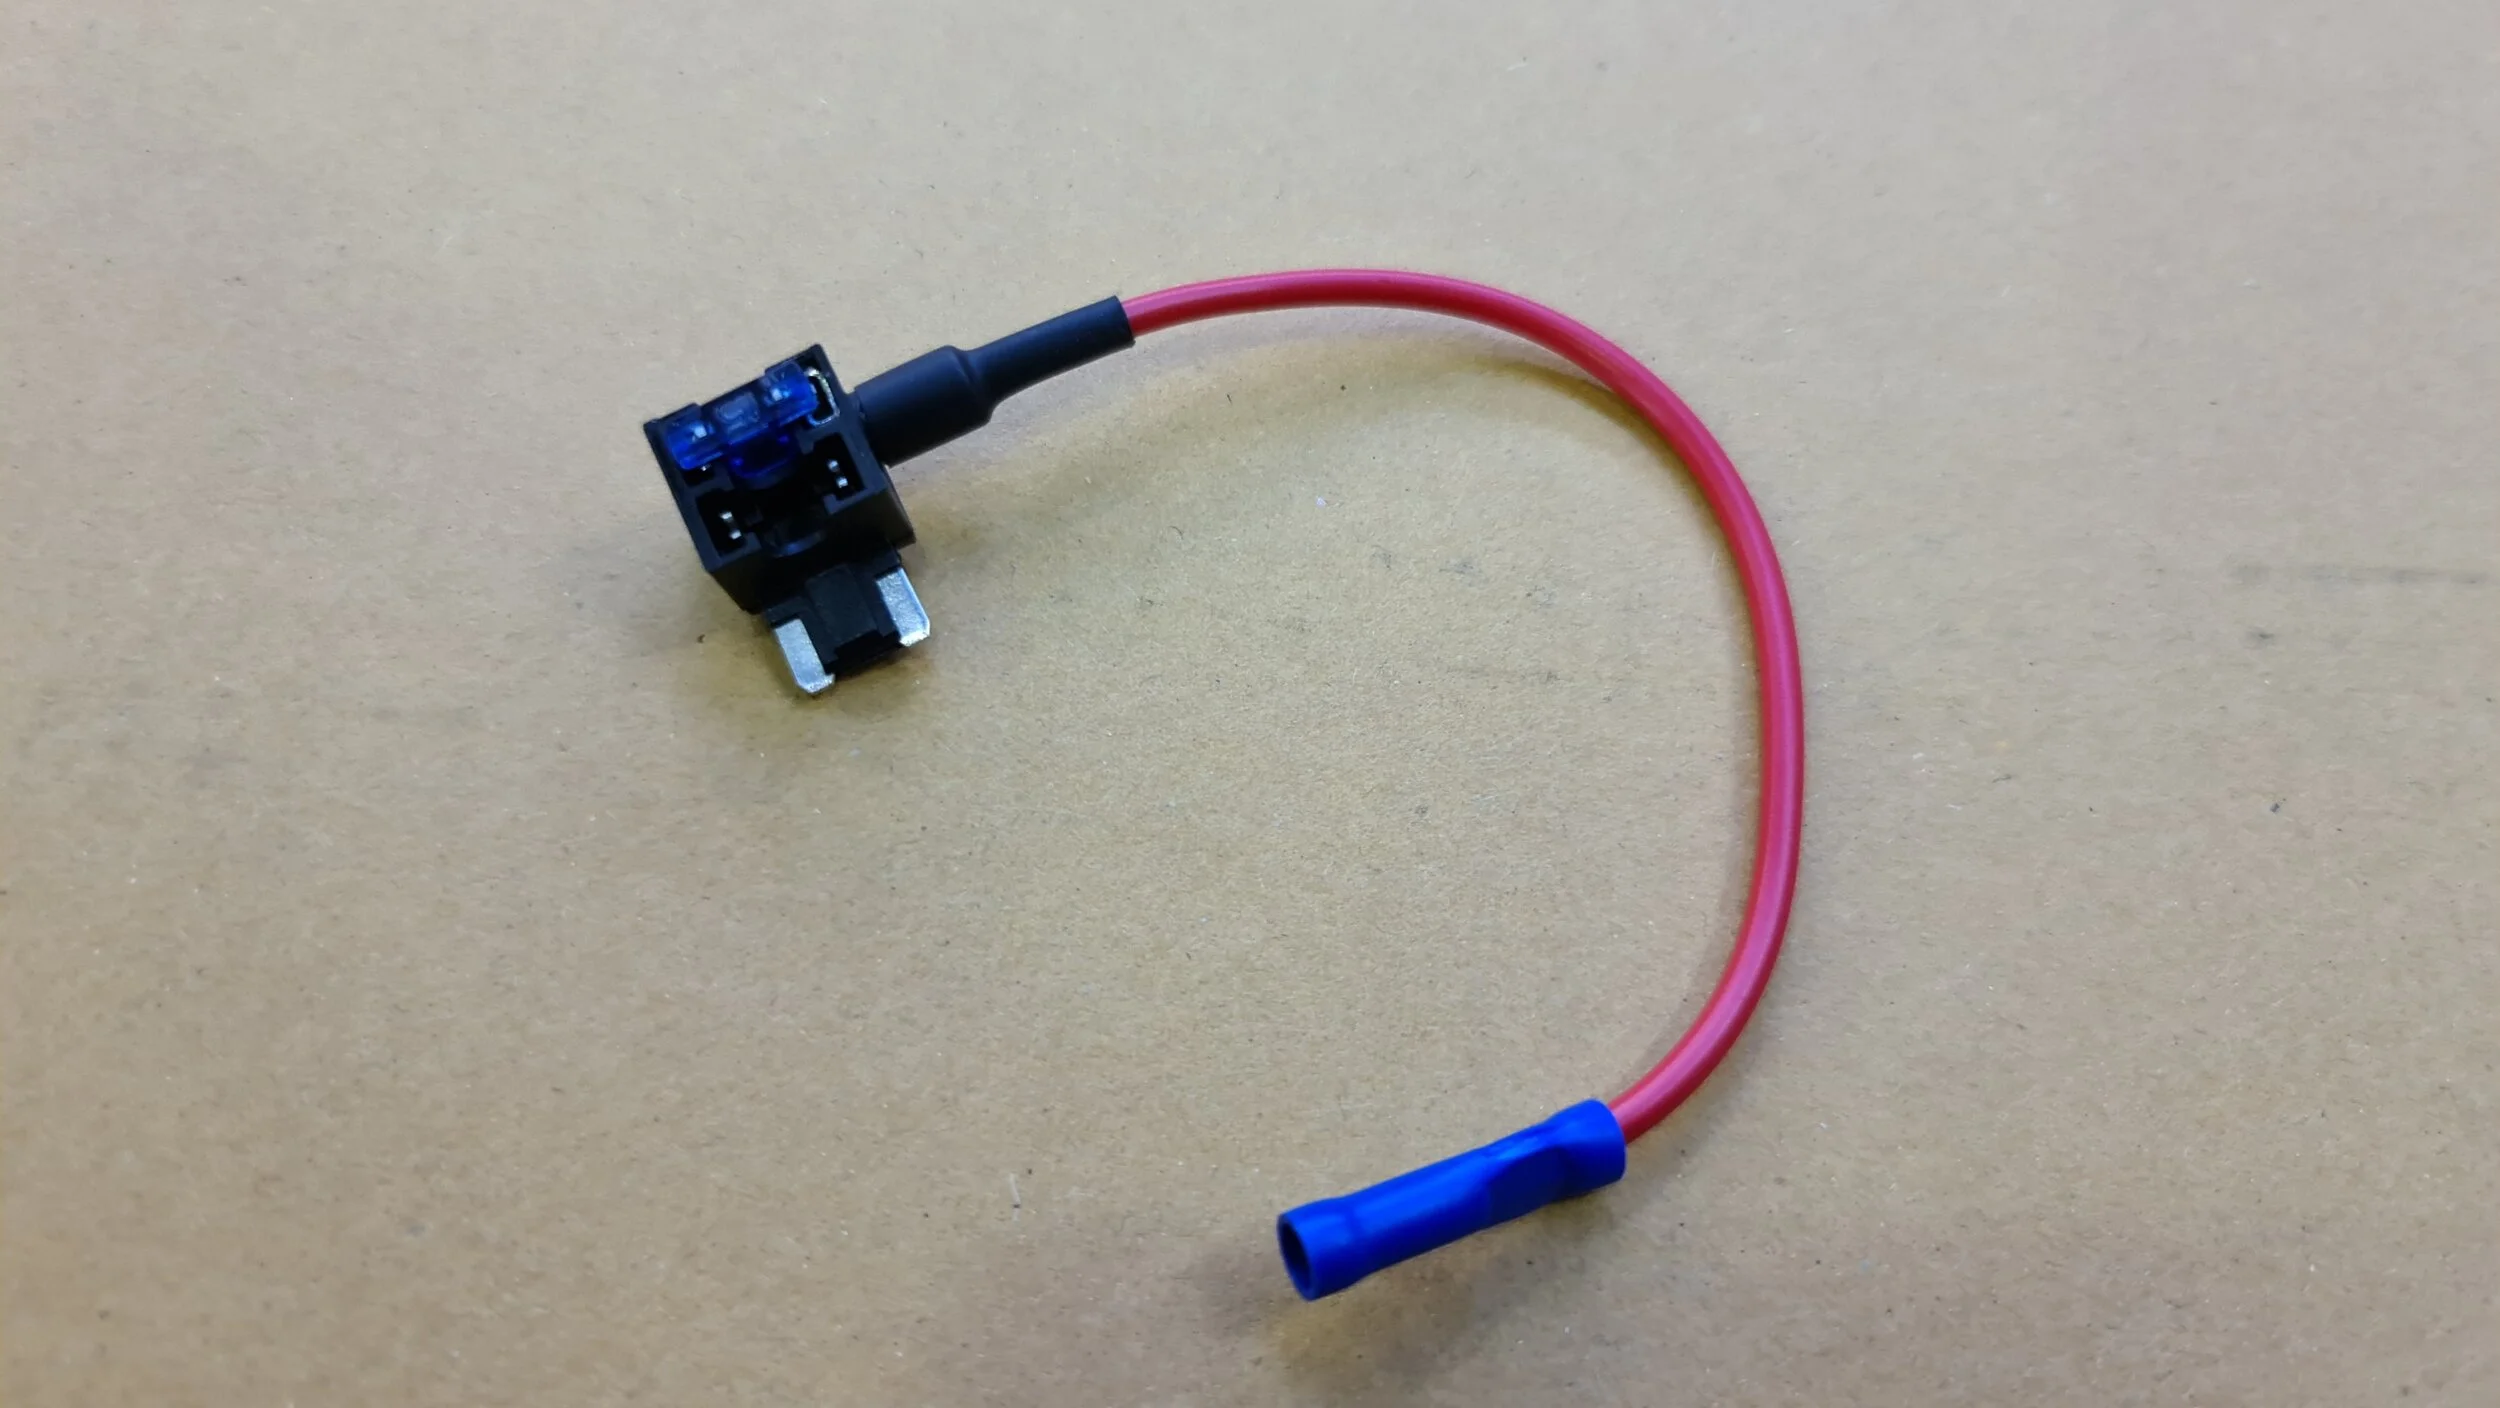
Add a Circuit - Double Up Fuse holder
1. Locate an onboard power source that can deliver a continuous 10 Amp current. This source is usually located on fuse panel, accessory outlet, etc. Consult with the owner’s vehicle manual to ensure location of an appropriate power source. Using an ‘Add a Circuit’ double up fuse holder is usually a safe way to connect to a power source. (Note: if connecting direct to the battery, then a separate relay switched to an ignition source is recommended so battery does not run flat)
2. Once the power source is located, route the wiring harness from the seat, underneath the carpet to access the power source. Be sure to avoid any seat bolt points or sharp objects behind. Connect the Positive Red wires to the power source and the Negative Brown to a suitable ‘ground/earth’ point.
3. Find a suitable location for your seat heater switches, either on the side of the seats, front dash, or floor mounted center console in between the driver and passenger seats. Be sure there is enough space behind the panels before drilling, to allow for wires.
4. At the desired switch location, drill a hole and push the wiring loom attached to the switch though the hole, leaving approximately 20 cm exposed. Route the main wiring harness up to meet the switch harness connector. Attach the switch connector with the main wiring connector.
5. Align the switch correctly and push snuggly into the hole until you hear a “click”.
6. Re-install the vehicle seat, and attach the connectors secured underneath the seat with the connector pulled up through the carpet.
7. Slide seat fully forwards and back, making sure there is enough loose wiring harness to move freely. If there is any tension, adjust the wiring length under the seat.
8. Reconnect battery terminals and start your ignition.
9. Press the seat heater switch to the upward position for HIGH heat setting. The middle setting is the OFF position. Press the switch down to the lower position to engage the LOW temperature setting.
CAUTION: If at any time you feel that the seat heaters are too hot or causing dizziness due to overheating, turn off the seat heaters and move your vehicle to the side of the road, stop and carefully exit the vehicle and wait to regain composure. If you feel that the seat heaters are malfunctioning, please consult with your professional installer.